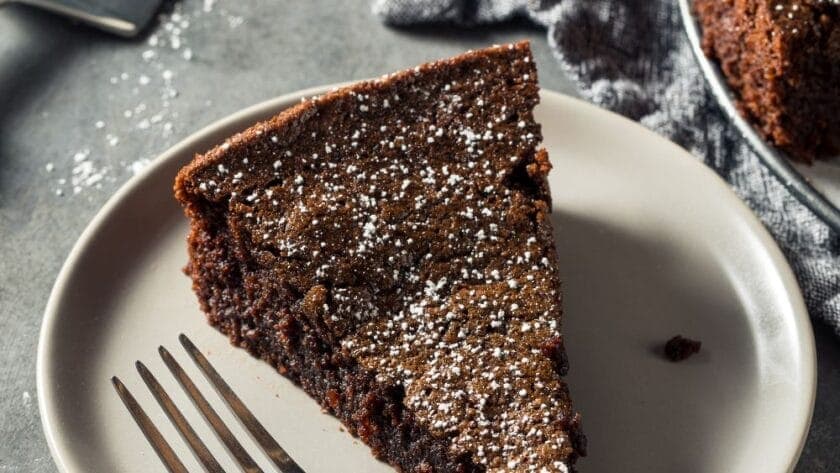
Nigella Chocolate Olive Oil Cake is one of those bakes that feels both simple and a little bit special. It is deeply chocolatey, rich without being heavy, and cooked on the stovetop, which gives it a soft, almost pudding-like middle and a glossy dark finish.
I make this when I want a cake that looks understated but tastes bold. With cocoa powder, extra-virgin olive oil, dark chocolate, and a gentle covered-pan method, it fits everything from a quiet weekend treat to an easy after-dinner dessert, and it is ready in 60 minutes.
What Exactly Is Nigella Chocolate Olive Oil Cake?
Nigella Chocolate Olive Oil Cake is a moist chocolate cake made with olive oil instead of butter, which gives it a tender crumb and a faint fruity bitterness that balances the sugar beautifully. It leans into deep cocoa flavour rather than frosting-heavy sweetness, so every bite tastes grown-up and rounded.
This version uses a stovetop method rather than a standard oven bake. Think of it as a cake meeting a steamed pudding halfway: soft, dark, glossy, and surprisingly elegant once sliced.
Try Nigella Dessert Recipes
- Nigella Courgette and Lime Cake
- Nigella Lemon Meringue Cake
- Nigella Coconut And Raspberry Cake
- Nigella Lemon and Almond Cake
- Nigella Chocolate Raspberry Cake
Why This Recipe Is a Must-Try
- Stovetop ease — No oven? No problem. The covered-pan method creates a gentle heat that cooks the cake evenly and keeps the crumb tender.
- Olive oil richness — Extra-virgin olive oil gives this cake character. It adds moisture and a subtle bitter edge that stops the chocolate from feeling flat.
- Cocoa-forward flavour — This is not a timid chocolate cake. The cocoa leads from the first bite, while the chopped dark chocolate on top adds little pockets of intensity.
- Small-batch comfort — With 4 servings, it is ideal when you want cake without leftovers taking over the kitchen. Sometimes a modest cake is the smartest cake.
- Simple ingredients — Flour, cocoa, eggs, sugar, milk, and olive oil do the heavy lifting here. Nothing fancy, yet the result tastes polished.
- Flexible finish — Serve it slightly warm, fully cooled, or made a day ahead. As it rests, the flavour settles in like tea steeping properly.
Key Ingredients Needed for Nigella Chocolate Olive Oil Cake
- Olive oil — 1 tbsp olive oil greases the pan so the delicate cake releases cleanly after cooking.
- All-purpose flour — 1 cup gives the batter structure and helps the cake hold its shape once cooled.
- Unsweetened natural cocoa powder — 1/2 cup, sifted, brings the deep chocolate flavour and keeps the batter smooth.
- Baking soda — 1 tsp helps the cake rise evenly and keeps the crumb light rather than dense.
- Fine sea salt — 1/2 tsp sharpens the cocoa flavour and balances the sweetness.
- Granulated sugar — 1 cup sweetens the cake and helps create that glossy, dark finish.
- Large eggs — 2 large eggs, at room temperature, bind the batter and support the tender texture.
- Extra-virgin olive oil — 1/2 cup adds moisture, richness, and that signature fruity bitterness.
- Vanilla extract — 1 tsp rounds out the chocolate notes and softens any harsh edges.
- Whole milk — 1/2 cup, at room temperature, loosens the batter and keeps the crumb soft.
- Hot water — 1/2 cup blooms the cocoa and turns the batter glossy and fluid.
- Dark chocolate — 2 oz, finely chopped, is scattered on top for garnish and a little extra bite.
Equipment
- Cake pan — An 8-inch round cake pan or a 7-inch deep stovetop-safe baking tin works best.
- Mixing bowls — Use one medium bowl for the dry ingredients and one large bowl for the wet mixture.
- Whisk — A whisk helps keep the batter smooth and evenly mixed without overworking it.
- Large covered pot — A deep skillet, Dutch oven, or wide pot with a tight-fitting lid is essential for stovetop cooking.
- Heatproof rack — A rack, metal cookie cutter, or canning ring lifts the pan off the base of the pot.
- Wire rack — This helps the cake cool properly before slicing and garnishing.
Instructions to Make Nigella Chocolate Olive Oil Cake
- Prepare the pan — Lightly coat the bottom and sides of an 8-inch round cake pan or a 7-inch deep stovetop-safe baking tin with 1 tablespoon olive oil. Line the base with a round of parchment paper if you have it, and set a large, deep skillet, Dutch oven, or wide pot on the counter with a tight-fitting lid ready.
- Mix the dry ingredients — In a medium bowl, whisk together the all-purpose flour, sifted cocoa powder, baking soda, and fine sea salt for 30 to 45 seconds. This distributes the leavening and removes cocoa lumps, so do not skip sifting.
- Whisk the wet base — In a separate large bowl, whisk the granulated sugar, eggs, extra-virgin olive oil, and vanilla extract until glossy and slightly thickened, about 1 minute. Scrape the bowl well so no streaks of egg remain at the bottom.
- Add milk and dry mix — Whisk the whole milk into the egg mixture until fully incorporated. Add the dry ingredients in two additions, whisking gently after each just until no flour remains visible.
- Loosen with hot water — Pour in the hot water in a steady stream while whisking slowly until the batter loosens and turns glossy. If cocoa specks cling to the sides, scrape and fold them in with a flexible spatula.
- Fill the pan — Transfer the batter to the prepared cake pan and tap the pan firmly on the counter 2 to 3 times to release large trapped air bubbles. Place a folded kitchen towel or paper towel under the pot lid to catch condensation.
- Cook on low heat — Set a heatproof rack, metal cookie cutter, or canning ring inside the large skillet or pot, then place the filled cake pan on top. Cover and cook over low heat for 35 to 40 minutes, adjusting as needed so the cake sits in a very gentle environment without aggressive sizzling.
- Check for doneness — After 30 minutes, quickly uncover and test the cake by inserting a skewer into the center. It should come out with a few moist crumbs but no wet batter, and if needed, re-cover immediately and continue cooking 3 to 5 minutes more on low heat.
- Cool carefully — Remove the cake pan carefully from the pot and set it on a wire rack to cool for 15 minutes. Run a thin knife around the edge, invert the cake, peel off the parchment if used, and turn it right side up again.
- Garnish and slice — Let the cake cool at least another 20 minutes before garnishing, because the crumb is fragile while hot. Scatter the finely chopped dark chocolate over the warm cake so it softens slightly, then slice with a thin sharp knife, wiping the blade between cuts.
- Use the oven option if needed — For a primary oven alternative, bake the prepared batter in a greased 8-inch round pan at 350°F / 177°C for 28 to 32 minutes. The cake is done when the center springs back lightly and a skewer inserted in the middle comes out with a few moist crumbs attached.
Common Mistakes I Made (And How I Fixed Each One)
- The cocoa stayed lumpy — Once I skipped sifting and ended up with dry pockets in the crumb. Now I sift the 1/2 cup cocoa powder first, and the batter turns smooth and even.
- Overmixing toughened the cake — It is tempting to keep whisking until the batter looks perfect, but that can make the texture slightly heavy. I stop as soon as the flour disappears and the batter looks uniformly dark.
- Skipping the towel caused drips — Without a towel under the lid, condensation marked the top of the cake. Adding a folded kitchen towel or paper towel keeps the surface cleaner and more oven-like.
- Too much heat browned the bottom — Stovetop cakes need patience, not force. I keep the pot on low heat with faint, steady warmth rather than anything that sizzles loudly.
- Testing too late slowed me down — Waiting until the very end made it harder to judge the center. Checking after 30 minutes gives me time to re-cover and cook 3 to 5 minutes more if needed.
- Cutting early made messy slices — Warm cake is fragile, almost like trying to slice a cloud. Cooling it for 15 minutes in the pan and then at least another 20 minutes before garnishing gives much neater portions.
Healthier Version of Nigella Chocolate Olive Oil Cake
- Sugar reduction — Use 3/4 cup granulated sugar instead of 1 cup for a less sweet finish. The cake will still be chocolate-forward, just a little more restrained.
- Flour balance — Swap 1/2 cup of the all-purpose flour for 1/2 cup wholemeal flour. That adds a slightly nuttier taste and a bit more body.
- Milk switch — Replace the 1/2 cup whole milk with 1/2 cup semi-skimmed milk if you want a lighter batter. It still gives enough moisture for a tender crumb.
- Garnish restraint — Cut the dark chocolate garnish from 2 oz to 1 oz for a lighter finish. You still get texture and a chocolate top without as much richness.
- Portion control — Slice the finished cake into 6 smaller pieces instead of 4. Sometimes the easiest adjustment is simply making each serving a little slimmer.
What to Pair With Nigella Chocolate Olive Oil Cake
- Fresh berries — Raspberries or strawberries bring brightness that cuts through the rich cocoa. That sharp contrast works like a squeeze of lemon on something savoury.
- Whipped cream — A soft spoonful alongside the cake adds lightness without covering its flavour. Keep it barely sweetened so the chocolate stays in charge.
- Greek yogurt — Tangy yogurt pairs surprisingly well with Nigella Chocolate Olive Oil Cake. It gives you a cool, creamy counterpoint to the dark crumb.
- Espresso — A small coffee next to a slice makes the cocoa taste deeper and rounder. Bitter with bitter can be a beautiful thing.
- Vanilla ice cream — Cold vanilla ice cream melting into the warm or room-temperature cake feels classic for a reason. The contrast in temperature does half the work.
- Orange segments — Sweet citrus wakes the cake up and plays nicely with olive oil. Chocolate and orange rarely argue.
Pro Tips to Get Perfect Nigella Chocolate Olive Oil Cake Every Time
- Room-temperature ingredients matter — Use the eggs and whole milk at room temperature so the batter mixes smoothly. Cold ingredients can make the mixture look uneven and slightly resistant.
- Sifted cocoa is essential — Cocoa likes to clump, and those clumps do not vanish by wishful thinking. Sifting keeps the batter silky and the flavour evenly spread.
- Gentle whisking protects texture — Once the flour goes in, whisk only until no dry streaks remain. That keeps the crumb tender instead of edging toward tough.
- Hot water improves the batter — The 1/2 cup hot water loosens the mixture and helps the cocoa bloom. It may look thin, but that fluid batter is exactly what you want.
- Pan tapping releases bubbles — Tap the filled pan 2 to 3 times on the counter before cooking. This helps prevent large air pockets and keeps the slice more even.
- Low heat wins here — The cake should cook in quiet, steady warmth, not in a noisy rush. If the pot sounds active or smells overly toasty, the heat is too high.
- Cooling finishes the cake — The flavour improves as it cools, when the olive oil and cocoa settle into a fuller taste. Patience here pays off more than any extra garnish.
Easy Variations of Nigella Chocolate Olive Oil Cake
- Citrus twist — Add 1 tsp finely grated orange zest to the wet mixture for a brighter edge. Orange slips into the chocolate like it was always meant to be there.
- Coffee note — Replace the 1/2 cup hot water with 1/2 cup hot black coffee for a deeper, darker flavour. It will not taste like a mocha cake, just more intense.
- Sea salt finish — Sprinkle 1/8 tsp flaky sea salt over the chopped 2 oz dark chocolate garnish. That tiny contrast makes the sweetness feel more balanced.
- Nutty topping — Add 2 tbsp chopped toasted hazelnuts along with the dark chocolate garnish for crunch. The texture change makes each slice feel a little more dressed up.
- Vanilla boost — Increase the vanilla extract from 1 tsp to 1 1/2 tsp if you like a softer aromatic background. It rounds the edges without changing the heart of the cake.
- Milk chocolate garnish — Swap the 2 oz dark chocolate for 2 oz finely chopped milk chocolate if you want a sweeter top. The cake itself stays rich, but the finish turns gentler.
How to Store Nigella Chocolate Olive Oil Cake the Right Way
- Room temperature storage — Keep the cooled cake tightly wrapped at room temperature for up to 2 days. A cake tin or airtight container works well if the slices are fully cool first.
- Refrigerator option — Store it in the refrigerator for up to 5 days, tightly wrapped or in a sealed container. This is best if your kitchen runs warm or you want firmer slices.
- Freezer method — Freeze individual slices or the whole cake, well wrapped, for up to 2 months. I like wrapping in parchment first, then a tight layer of foil or a freezer-safe box.
- Thawing approach — Defrost overnight in the refrigerator or for 1 to 2 hours at room temperature. That gradual thaw helps the crumb stay moist rather than patchy.
- Before storing — Always cool the cake completely before wrapping it. Trapped warmth creates moisture, and extra moisture is not your friend here.
The Best Ways to Reheat Nigella Chocolate Olive Oil Cake
- Oven reheating — Warm slices in a 300°F / 149°C oven for 6 to 8 minutes. This is the best method when you want the crumb soft and evenly heated.
- Microwave shortcut — Microwave each slice on medium power in 10-second bursts just until lightly warmed. It is quick, but stop early so the cake does not turn rubbery.
- Air fryer option — Reheat a slice in an air fryer at 300°F / 149°C for about 3 to 4 minutes, checking early. This works well for a slightly crisper edge while keeping the center soft.
- Stovetop method — Set a slice in a covered pan over very low heat for a few minutes until just warmed through. Keep the heat gentle and watch for any browning on the base.
Nutrition (Per Serving)
- Calories — about 590
- Protein — around 8.8g
- Fat — about 29.3g
- Carbohydrates — around 80.3g
- Fiber — about 7.8g
- Sugar — around 54.9g
- Sodium — about 458mg
FAQs
Can I bake Nigella Chocolate Olive Oil Cake in the oven instead?
Yes. Bake the prepared batter in a greased 8-inch round pan at 350°F / 177°C for 28 to 32 minutes. It is ready when the center springs back lightly and a skewer comes out with a few moist crumbs.
Why is the batter so thin?
That loose texture is completely normal because of the 1/2 cup hot water. It helps create the moist, tender crumb that makes this cake so distinctive.
Do I have to use extra-virgin olive oil?
For this recipe, yes, because it gives the cake its signature fruity bitterness and richness. It is part of what makes Nigella Chocolate Olive Oil Cake taste more interesting than a standard chocolate sponge.
How do I know when the stovetop cake is done?
After 30 minutes, test the center with a skewer. You want a few moist crumbs but no wet batter, and the top should look matte rather than shiny and liquid.
Can I make it ahead of time?
Absolutely. In fact, the flavour improves as the cake cools and rests, because the olive oil and cocoa settle into a fuller taste. Make it earlier in the day or even the day before.
Why did my cake stick to the pan?
The pan likely needed more careful greasing, or parchment would have helped. Lightly coating the bottom and sides with 1 tbsp olive oil and lining the base makes release much easier.
Final Thoughts
Nigella Chocolate Olive Oil Cake proves that a simple ingredient list can still give you something memorable. It is rich, dark, and quietly impressive, like a good black coat that works every time.
If you want a chocolate cake with real character and a stovetop method that actually delivers, this one is well worth making. Try it once, and I think it will earn a regular place in your kitchen.
PrintNigella Chocolate Olive Oil Cake
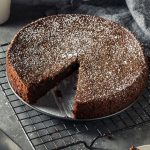
This stovetop adaptation of Nigella-style chocolate olive oil cake is deeply cocoa-forward, moist, and almost pudding-like at the center, with the fruity bitterness of extra-virgin olive oil balancing the sweetness. A gentle covered-pan cook mimics an oven’s enclosed heat, producing a tender crumb and a glossy, dark finish that slices cleanly once cooled.
- Prep Time: 20
- Cook Time: 40
- Total Time: 60
- Yield: 4 1x
- Category: Main Course
- Method: Stovetop
- Cuisine: International
Ingredients
- 1 tbsp olive oil, for greasing the pan
- 1 cup all-purpose flour
- 1/2 cup unsweetened natural cocoa powder, sifted
- 1 tsp baking soda
- 1/2 tsp fine sea salt
- 1 cup granulated sugar
- 2 large eggs, at room temperature
- 1/2 cup extra-virgin olive oil
- 1 tsp vanilla extract
- 1/2 cup whole milk, at room temperature
- 1/2 cup hot water
- 2 oz dark chocolate, finely chopped, for garnish
Instructions
- Lightly coat the bottom and sides of an 8-inch round cake pan or a 7-inch deep stovetop-safe baking tin with 1 tablespoon olive oil. Line the base with a round of parchment paper if you have it, which helps the delicate cake release cleanly after steaming-dry stovetop cooking. Set a large, deep skillet, Dutch oven, or wide pot on the counter and make sure it has a tight-fitting lid.
- In a medium bowl, whisk together the all-purpose flour, sifted cocoa powder, baking soda, and fine sea salt for 30 to 45 seconds. This evenly distributes the leavening and breaks up cocoa lumps so the batter stays smooth and rises uniformly. Do not skip sifting the cocoa, because compacted cocoa can leave dry pockets in the finished cake.
- In a separate large bowl, whisk the granulated sugar, eggs, extra-virgin olive oil, and vanilla extract until the mixture looks glossy and slightly thickened, about 1 minute. You are not trying to whip in a great deal of air, only to emulsify the oil with the eggs so the crumb bakes up even and tender. Scrape the bowl well so no streaks of egg remain at the bottom.
- Whisk the whole milk into the egg mixture until fully incorporated. Add the dry ingredients in two additions, whisking gently after each just until no flour remains visible. Overmixing at this stage can make the cake slightly tough, so stop as soon as the batter is uniformly dark and smooth.
- Pour in the hot water in a steady stream while whisking slowly until the batter loosens and turns glossy. The batter will seem quite fluid, which is correct for a moist chocolate olive oil cake and helps it cook through gently on the stovetop. If you see small cocoa specks clinging to the sides, scrape and fold them in with a flexible spatula.
- Transfer the batter to the prepared cake pan and tap the pan firmly on the counter 2 to 3 times to release any large trapped air bubbles. Place a folded kitchen towel or paper towel under the pot lid to catch condensation, keeping drips from marking the surface of the cake. This simple step helps mimic the dry top heat of an oven.
- Set a heatproof rack, metal cookie cutter, or canning ring inside the large skillet or pot, then place the filled cake pan on top. Cover the pot and cook over low heat for 35 to 40 minutes, adjusting as needed to maintain a very gentle environment; the cake should not sizzle aggressively. You want faint, steady heat so the center sets before the bottom overbrowns.
- After 30 minutes, quickly uncover and test the cake by inserting a skewer into the center. It should come out with a few moist crumbs but no wet batter, and the top should look matte rather than shiny and liquid. If needed, re-cover immediately and continue cooking 3 to 5 minutes more on low heat.
- Remove the cake pan carefully from the pot and set it on a wire rack to cool for 15 minutes. Run a thin knife around the edge, then invert the cake, peel off the parchment if used, and turn it right side up again. Let it cool at least another 20 minutes before garnishing, because the crumb is fragile while hot.
- Scatter the finely chopped dark chocolate over the warm cake so it softens slightly, or leave it as a textured garnish if you prefer a cleaner finish. Slice with a thin sharp knife, wiping the blade between cuts for neat portions. The flavor improves as the cake cools, when the olive oil and cocoa settle into a fuller, more rounded taste.
- For a primary oven alternative, bake the prepared batter in a greased 8-inch round pan at 350°F / 177°C for 28 to 32 minutes. The cake is done when the center springs back lightly and a skewer inserted in the middle comes out with a few moist crumbs attached.
Notes
Store the cooled cake tightly wrapped at room temperature for up to 2 days or in the refrigerator for up to 5 days. Freeze individual slices or the whole cake, well wrapped, for up to 2 months; thaw overnight in the refrigerator or for 1 to 2 hours at room temperature. To reheat, warm slices in a 300°F / 149°C oven for 6 to 8 minutes, or microwave each slice on medium power in 10-second bursts just until lightly warmed.
Nutrition
- Calories: 590
- Sugar: 54.9g
- Sodium: 458mg
- Unsaturated Fat: 6.3g
- Carbohydrates: 80.3g
- Fiber: 7.8g
- Protein: 8.8g
- Cholesterol: 117mg
Keywords: Nigella chocolate olive oil cake, stovetop chocolate cake, olive oil cocoa cake, dairy free chocolate cake, one pan cake, international dessert cake