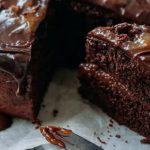
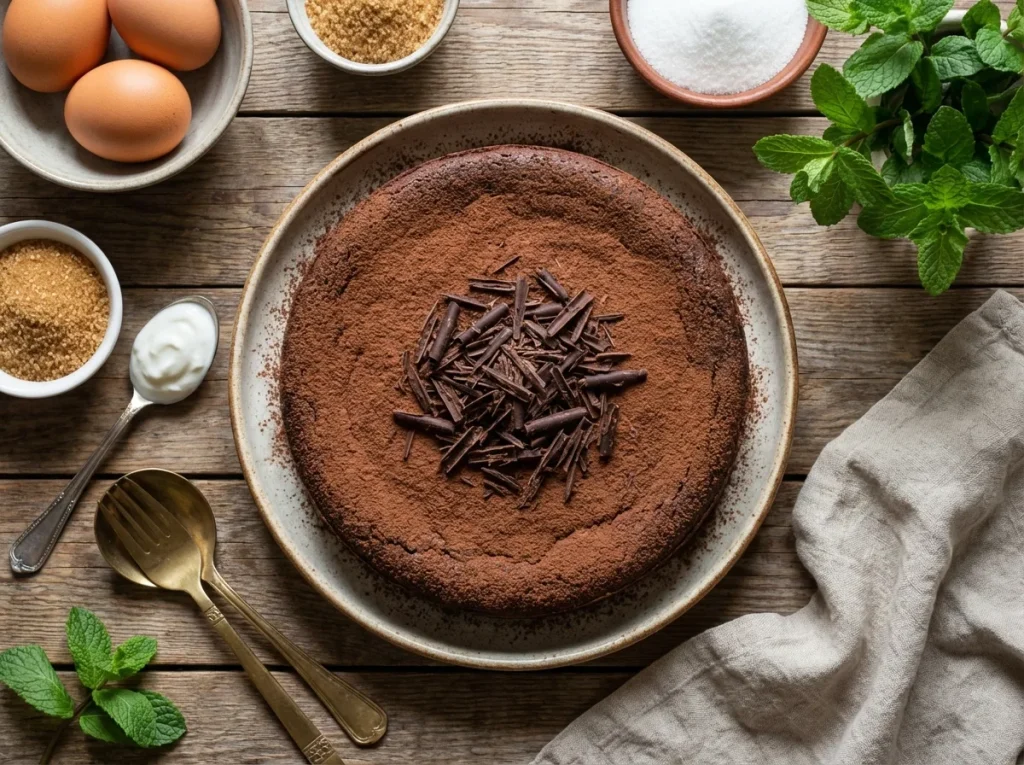
If you’re looking for a supremely moist, deeply chocolatey cake that feels both elegant and effortless, the Nigella Chocolate Yogurt Cake is your answer. It’s a single-layer wonder that relies on Greek yogurt and oil for an incredibly tender crumb, and it needs no frosting—just a whisper of powdered sugar. From start to finish, it takes about an hour, and the method is beginner-friendly.
The only step that might give you pause is the addition of boiling water to the batter, but trust the process. It makes the chocolate flavor sing.
What Exactly Is Nigella Chocolate Yogurt Cake?
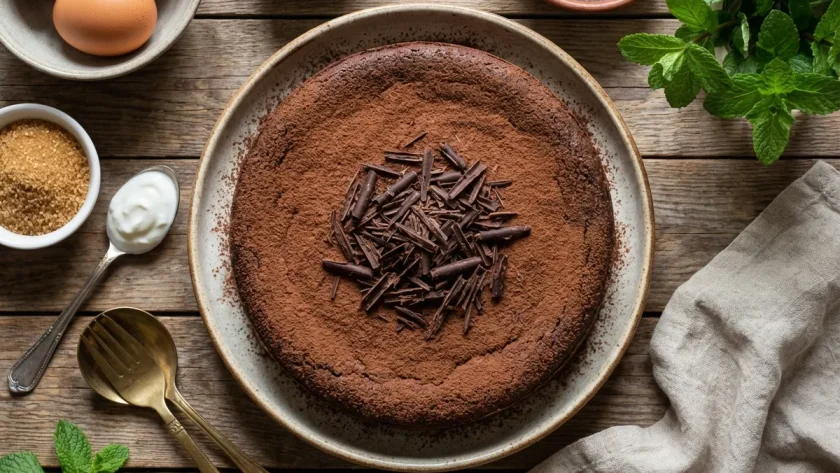
This is a simple, American-style chocolate cake that celebrates texture and flavor over fussy decoration. It’s a single-layer dessert, baked in a standard 6-inch round pan, which makes it perfect for a small gathering or a weeknight treat.
What sets it apart is the use of full-fat Greek yogurt and vegetable oil instead of butter. This combination guarantees a moist crumb that stays soft for days. The result is a rich, not-too-sweet chocolate experience that’s perfect with a cup of coffee.
Why This Recipe Is a Must-Try
Here are the reasons I keep coming back to this recipe.
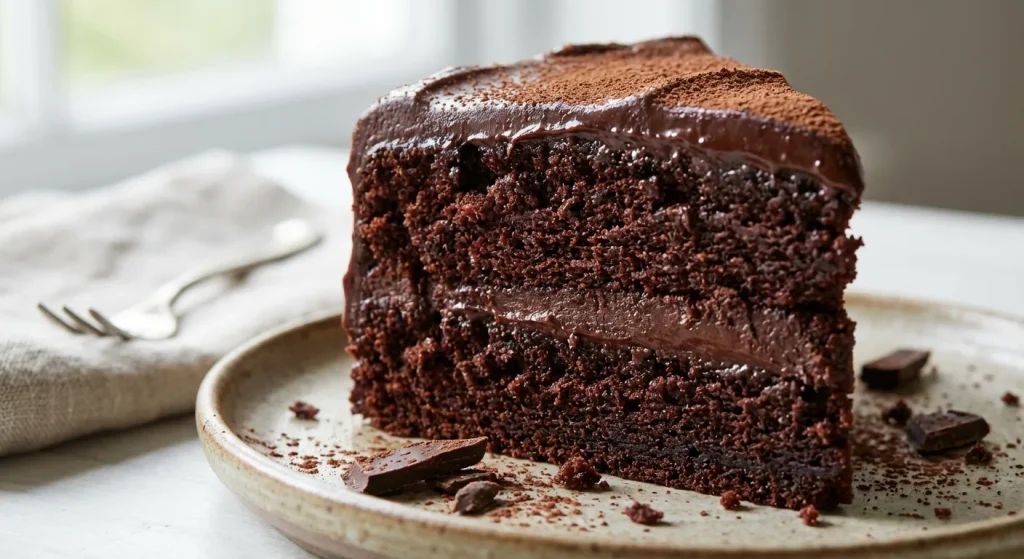
- Unbeatable Moisture — The yogurt and oil team up to create a cake that stays incredibly soft and tender, even after a day or two on the counter.
- Deep Chocolate Flavor — Blooming the cocoa powder with boiling water intensifies its richness, giving you a sophisticated taste without needing expensive chocolate bars.
- Minimal Effort, Maximum Reward — You mix it in one bowl with a whisk and a spatula. There’s no creaming butter and sugar, and no layers to frost.
- Versatile Serving — It’s elegant enough for a dinner party dusted with sugar, but also humble enough for an afternoon snack straight from the pan.
- Crowd-Pleasing Simplicity — Its unpretentious charm and fantastic texture win over everyone, from chocolate purists to those who usually find cake too sweet.
Key Ingredients Needed for Nigella Chocolate Yogurt Cake
Each ingredient here has a specific job. Using the right ones makes all the difference.
- 1/2 cup (120ml) plain full-fat Greek yogurt — This is the secret to the cake’s moisture and tender texture. Full-fat is non-negotiable for the best result.
- 1 large egg, at room temperature — It helps bind the batter and adds structure. A room-temperature egg blends in more smoothly.
- 1/2 cup (100g) granulated sugar — Provides sweetness and helps with browning.
- 1/4 cup (50g) light brown sugar, packed — Adds a subtle molasses note and contributes to the moist crumb.
- 1/3 cup (80ml) neutral vegetable oil — Oil keeps the cake moist far longer than butter would. Use canola, grapeseed, or a light olive oil.
- 1 teaspoon pure vanilla extract — Enhances the overall flavor profile of the chocolate.
- 1/2 cup (63g) all-purpose flour, spooned and leveled — The main structure-builder. Spooning and leveling prevent using too much.
- 1/3 cup (28g) unsweetened cocoa powder, sifted — The star of the show. Sifting is crucial to avoid lumps. Dutch-process cocoa will give a darker, richer color.
- 1/2 teaspoon baking soda — Reacts with the acidic yogurt to help the cake rise.
- 1/4 teaspoon baking powder — Provides an extra lift for a light texture.
- 1/4 teaspoon fine sea salt — Balances the sweetness and intensifies the chocolate flavor.
- 1/2 cup (120ml) boiling water — This “blooms” the cocoa, unlocking its full flavor, and thins the batter to the perfect pouring consistency.
- 1 tablespoon powdered sugar, for dusting (Optional) — A simple, elegant finish that adds a touch of sweetness.
Equipments
- 6-inch round cake pan
- Parchment paper
- Large mixing bowl
- Whisk
- Flexible spatula
- Fine-mesh sieve
- Wire cooling rack
Instructions to Make Nigella Chocolate Yogurt Cake
The process is straightforward—here’s how I walk through it.
- Prep the Pan — Preheat your oven to 350°F (177°C). Grease a 6-inch round cake pan and line the bottom with a parchment circle. This is essential for the moist cake to release cleanly.
- Combine Wet Ingredients — In a large bowl, whisk the yogurt, egg, both sugars, oil, and vanilla for about 90 seconds. You want it completely smooth and slightly paler; this aeration helps with the cake’s lift.
- Sift Dry Ingredients — Place a sieve over the wet bowl. Add the flour, cocoa powder, baking soda, baking powder, and salt into it, then sift everything directly into the wet mix. This prevents lumps and ensures even distribution.
- Fold Gently — Use a spatula to fold the dry ingredients into the wet until just combined. The batter will be very thick. Overmixing here will make the cake tough.
- Add Boiling Water — Pour in the boiling water and fold gently until the batter becomes smooth, glossy, and thin. Don’t worry—this is exactly what you want.
- Transfer to Pan — Pour the batter into the prepared pan. Tap it firmly on the counter 2-3 times to release air bubbles, then smooth the top.
- Bake — Bake for 40-45 minutes. It’s done when the top springs back lightly and a tester comes out with a few moist crumbs, not wet batter. Avoid overbaking.
- Cool in Pan — Let the cake cool in the pan on a wire rack for 20 minutes. This allows it to sit so it doesn’t break when you turn it out.
- Finish Cooling — Run a knife around the edge, invert onto the rack, peel off the parchment, and let it cool completely (about 1 hour). This is key for the texture to set.
- Serve — Transfer to a plate, dust with powdered sugar if using, and slice with a sharp knife. It’s best at room temperature.
Common Mistakes I Made (And How I Fixed Each One)
I did not get this right on the first try. Here is what tripped me up.
- Cold Ingredients — Using a cold egg and yogurt meant the batter didn’t emulsify properly. Letting everything come to room temperature first made it blend smoothly and rise evenly.
- Skipping the Parchment — I thought greasing was enough. The moist cake stuck terribly. A parchment paper circle is now non-negotiable for a clean release.
- Overmixing the Batter — Vigorous stirring after adding the flour developed gluten, resulting in a dense, rubbery texture. Gentle folding until just combined is the secret to a tender crumb.
- Under-whisking the Wet Mix — Not whisking for the full 90 seconds meant I missed out on those tiny air bubbles that contribute to the cake’s light structure.
- Cutting While Warm — Impatience led to a gummy, crumbling slice. Letting it cool completely allows the crumb to set properly for clean cuts.
Healthier Version of Nigella Chocolate Yogurt Cake
You can make a few mindful swaps, but remember they will alter the texture and flavor.
- Reduce the Sugar — Cut both sugars by a quarter (use 75g total). The cake will be less sweet but still delicious, with a more pronounced cocoa bitterness.
- Try Whole Wheat Flour — Replace half the all-purpose flour with whole wheat pastry flour. It adds fiber and a nutty note, making the crumb slightly denser.
- Use a Sugar Substitute — Swap the granulated sugar for a cup-for-cup erythritol blend. Be aware this can sometimes create a cooler aftertaste.
- Opt for Low-Fat Yogurt — Using low-fat Greek yogurt will reduce the fat content, but the cake may be slightly less rich and moist.
What to Pair With Nigella Chocolate Yogurt Cake
This simple cake is a wonderful canvas for all sorts of accompaniments.
- Fresh Berries — A handful of raspberries or strawberries adds a bright, tart contrast to the rich chocolate.
- Whipped Cream or Crème Fraîche — A dollop of lightly sweetened cream cuts through the density and adds a luxurious feel.
- Strong Coffee or Espresso — The bitterness of coffee is a classic partner, making the chocolate notes taste even deeper.
- A Glass of Cold Milk — It’s a nostalgic, perfect pairing that never fails to satisfy.
- Vanilla Ice Cream — Serve a warm slice à la mode for a decadent dessert. The hot-and-cold contrast is fantastic.
Pro Tips to Get Perfect Nigella Chocolate Yogurt Cake Every Time
- Measure Flour Correctly — Spoon the flour into your measuring cup and level it off. Scooping packs directly into too much flour, leading to a dry cake.
- Sift the Cocoa Powder — Cocoa is notoriously clumpy. Sifting it with the other dry ingredients ensures a perfectly smooth batter without any bitter pockets.
- Use a Light-Colored Metal Pan — Dark pans can cause the edges to overbake before the center is done. A light pan promotes even baking.
- Test for Doneness Gently — Rely on the spring-back test and a few moist crumbs on a tester. If it comes out completely clean, the cake is already overbaked.
- Cool Completely Before Dusting — If you dust with powdered sugar while the cake is even slightly warm, the sugar will melt and disappear.
- Use a Serrated Knife to Slice — A gentle sawing motion with a serrated knife gives you the cleanest slices without compressing the tender crumb.
Easy Variations of Nigella Chocolate Yogurt Cake
A few simple tweaks can create a whole new dessert.
- Add Orange Zest — Stir the zest of one orange into the wet ingredients. The citrus brightens the deep chocolate flavor beautifully.
- Fold in Chocolate Chips — Mix 1/3 cup of dark or milk chocolate chips into the batter after adding the water for melty pockets of chocolate.
- Espresso Boost — Replace 2 tablespoons of the boiling water with freshly brewed espresso or strong coffee for a mocha twist.
- Spiced Version — Add 1/2 teaspoon of cinnamon and a pinch of cayenne pepper to the dry ingredients for a warm, subtle kick.
- Nutty Crunch — Sprinkle 1/4 cup of chopped toasted hazelnuts or walnuts over the batter in the pan before baking.
How to Store Nigella Chocolate Yogurt Cake the Right Way
- Room Temperature (Short Term) — Once completely cool, wrap the whole cake tightly in plastic wrap or store in an airtight container. It will stay moist for up to 2 days.
- Refrigerate for Longer — For storage up to 5 days, keep it in the fridge in an airtight container. Let it come to room temperature before serving for the best texture.
- Freeze for Future Use — Wrap the cooled cake (whole or in slices) tightly in plastic wrap, then in foil or a freezer bag. It freezes well for up to 3 months.
- Thaw Gently — Thaw frozen cake overnight in the fridge or at room temperature for several hours. Avoid microwaving to thaw, as it can create soggy spots.
The Best Ways to Reheat Nigella Chocolate Yogurt Cake
- Quick Microwave Warm-Up — Place a slice on a microwave-safe plate and heat in 10-second bursts until just warmed through. Stop before it gets hot, or it can dry out.
- Oven Refresh — For the best texture, warm slices in a 300°F (149°C) oven for 5-8 minutes. This gently revives the moisture without making it soggy.
- Air Fryer Method — Place a slice in the air fryer basket at 300°F (149°C) for 3-4 minutes. Watch it closely to prevent over-drying.
Nutrition (Per Serving)
Based on 1 serving = 1 slice out of 4 total.
- Calories: 385
- Protein: about 7g
- Fat: 21g
- Carbohydrates: around 47g
- Fiber: 3g
- Sugar: roughly 30g
- Sodium: 280mg
Try Other Nigella Recipes
- Nigella Fudge Cake
- Nigella Mars Bar Cake
- Nigella Marzipan Cake
- Nigella Lemon Yogurt Cake
- Nigella Pear Cake
FAQs
Can I make this cake in a different-sized pan?
Yes, but adjustments are needed. For an 8-inch pan, double the recipe and check for doneness around 30-35 minutes. The cake will be thinner, so watch it closely to avoid overbaking.
Can I use regular yogurt instead of Greek yogurt?
You can, but the cake may be slightly less dense. Regular yogurt has more whey, which can make the batter thinner. For best results, stick with thick, full-fat Greek yogurt.
How long does Nigella Chocolate Yogurt Cake last in the fridge?
Stored in an airtight container, it will keep well in the refrigerator for up to 5 days. Always let it come to room temperature before serving to restore its soft texture.
Can I freeze Nigella Chocolate Yogurt Cake?
Absolutely. Wrap the cooled cake tightly in plastic wrap and then foil. It freezes perfectly for up to 3 months. Thaw overnight in the fridge.
My cake sunk in the middle. What happened?
A sunken center usually means it was underbaked, the oven door was opened too early, or there was too much leavener. Ensure your baking soda and powder are fresh, and don’t open the oven door until at least the 35-minute mark.
Can I make this recipe dairy-free?
You can try using a thick, plain dairy-free yogurt alternative. The results can vary, but it should work. The flavor and texture will be slightly different from the original.
Final Thoughts
This cake has become a steadfast favorite in my kitchen for its reliability and understated elegance. The Nigella Chocolate Yogurt Cake proves that you don’t need complex techniques or a long ingredient list to create something truly special. I hope it brings as much simple, chocolatey joy to your table as it has to mine.
PrintNigella Chocolate Yogurt Cake
This supremely moist, single-layer chocolate cake gets its tender crumb and rich flavor from full-fat Greek yogurt and vegetable oil. It requires no frosting—just a dusting of powdered sugar—and delivers a deeply chocolatey, not-too-sweet experience perfect with coffee or as an elegant, simple dessert.
- Prep Time: 15
- Cook Time: 45
- Total Time: 60
- Yield: 4 1x
- Category: Dessert
- Method: Baking
- Cuisine: American
Ingredients
- For the Cake:
- 1/2 cup (120ml) plain full-fat Greek yogurt
- 1 large egg, at room temperature
- 1/2 cup (100g) granulated sugar
- 1/4 cup (50g) light brown sugar, packed
- 1/3 cup (80ml) neutral vegetable oil (such as canola or grapeseed)
- 1 teaspoon pure vanilla extract
- 1/2 cup (63g) all-purpose flour, spooned and leveled
- 1/3 cup (28g) unsweetened cocoa powder, sifted (preferably Dutch-process)
- 1/2 teaspoon baking soda
- 1/4 teaspoon baking powder
- 1/4 teaspoon fine sea salt
- 1/2 cup (120ml) boiling water
- For Serving (Optional):
- 1 tablespoon powdered sugar, for dusting
Instructions
- Preheat your oven to 350°F (177°C). Grease a 6-inch round cake pan with butter or non-stick spray, then line the bottom with a circle of parchment paper. This ensures easy release and prevents sticking. Do not skip the parchment, as the moist cake can adhere to the pan.
- In a large mixing bowl, combine 1/2 cup Greek yogurt, 1 large egg, 1/2 cup granulated sugar, 1/4 cup light brown sugar, 1/3 cup vegetable oil, and 1 teaspoon vanilla extract. Whisk vigorously by hand for about 90 seconds until the mixture is completely smooth, emulsified, and slightly paler in color. This aeration incorporates tiny air bubbles that contribute to the cake’s lift.
- Place a fine-mesh sieve over the bowl with the wet ingredients. Add 1/2 cup all-purpose flour, 1/3 cup cocoa powder, 1/2 teaspoon baking soda, 1/4 teaspoon baking powder, and 1/4 teaspoon fine sea salt into the sieve. Sift all the dry ingredients directly into the wet mixture. This eliminates lumps in the cocoa and ensures even distribution of leaveners and salt.
- Using a flexible spatula, gently fold the dry ingredients into the wet mixture. Use broad, sweeping motions, scraping from the bottom and folding over until just combined and no dry pockets remain. Be careful not to overmix, as this will develop gluten and make the cake tough. The batter will be very thick at this stage.
- Pour 1/2 cup of boiling water into the batter. The hot water will ‘bloom’ the cocoa powder, intensifying its chocolate flavor, and will also thin the batter significantly. Fold gently with the spatula until the water is fully incorporated and the batter is smooth, glossy, and pourable.
- Immediately pour the batter into the prepared cake pan. Tap the pan firmly on the counter 2-3 times to release any large air bubbles. This helps create an even crumb structure. Use the spatula to smooth the top into an even layer.
- Place the pan in the center of the preheated oven. Bake for 40-45 minutes. The cake is done when the top is domed, set, and springs back lightly when touched in the center. A toothpick or cake tester inserted into the middle should come out with a few moist crumbs attached, but not wet batter. Avoid overbaking, which dries out the cake.
- Remove the cake from the oven and place the pan on a wire cooling rack. Let it cool in the pan for 20 minutes. This allows the structure to set, making it less likely to break. After 20 minutes, run a thin knife around the edges to loosen, then invert the cake onto the rack, peel off the parchment paper, and let it cool completely, about 1 hour.
- Once completely cool, transfer the cake to a serving plate. If desired, place 1 tablespoon of powdered sugar in a fine-mesh sieve and dust it evenly over the top of the cake just before serving. This adds a light sweetness and elegant finish without overpowering the chocolate flavor.
- Slice with a sharp, thin-bladed knife, wiping it clean between cuts for neat portions. Serve at room temperature. The cake’s flavor and texture are best after it has fully cooled, allowing the crumb to set and the flavors to meld.
Notes
Storage: Cool completely, then wrap tightly in plastic wrap or store in an airtight container at room temperature for up to 2 days. For longer storage, refrigerate for up to 5 days. Let come to room temperature before serving for best texture. Freezing: Wrap the whole cooled cake or individual slices tightly in plastic wrap, then in aluminum foil or a freezer bag. Freeze for up to 3 months. Thaw overnight in the refrigerator or at room temperature for several hours. Reheating: For a warm cake, place a slice on a microwave-safe plate and microwave in 10-second bursts until just warmed through, being careful not to overheat and dry it out. Alternatively, warm in a 300°F (149°C) oven for 5-8 minutes.
Nutrition
- Calories: 385
- Sugar: 30g
- Sodium: 280mg
- Saturated Fat: 3.5g
- Carbohydrates: 47g
- Fiber: 3g
- Protein: 7g
- Cholesterol: 48mg
Keywords: Nigella chocolate yogurt cake, chocolate yogurt cake, easy chocolate cake, one bowl chocolate cake, Greek yogurt cake, moist chocolate cake, simple dessert, no-frosting cake, Nigella Lawson inspired, baking, weeknight dessert, tea cake